kubernetes-101
kubernetes 101 for developers
This is a hands-on tutorial to deploy basic services with kubectl and helm on kubernetes cluster running on local machine.
👉🏼 No cloud account needed.
👉🏼 No Docker desktop needed.
This tutorial is composed on Intel based Macbook, all the commands and processes should be same for any other machine except tool installation commands.
Table of contents
System Setup
-
install Docker CLI
brew install docker -
install hyperkit to be used as docker run time.
brew install hyperkit -
install minikube to be used as kubernetes cluster
brew install minikube -
configure minikube resources (optional)
minikube config set cpus 6 minikube config set memory 12g -
start minikube
minikube start --driver=hyperkit --container-runtime=docker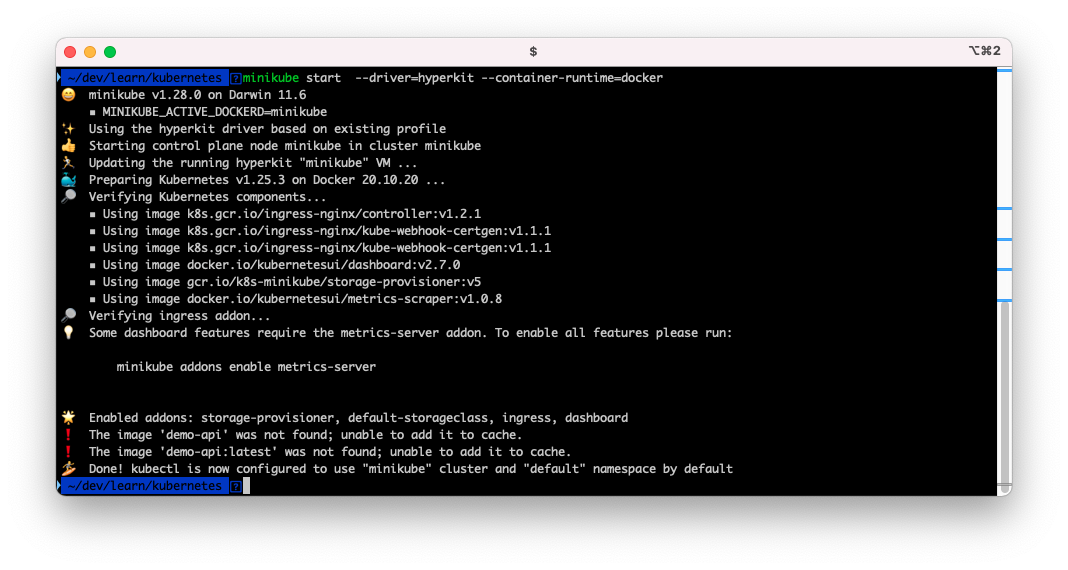
-
verify minikube
minikube kubectl get nodes!minkube get pods](./docs/minikube_get_po.png)
-
point terminal’s Docker CLI to the Docker instance inside minikube
eval $(minikube docker-env) -
Optionally you can open minikube dashboard
minikube dashboard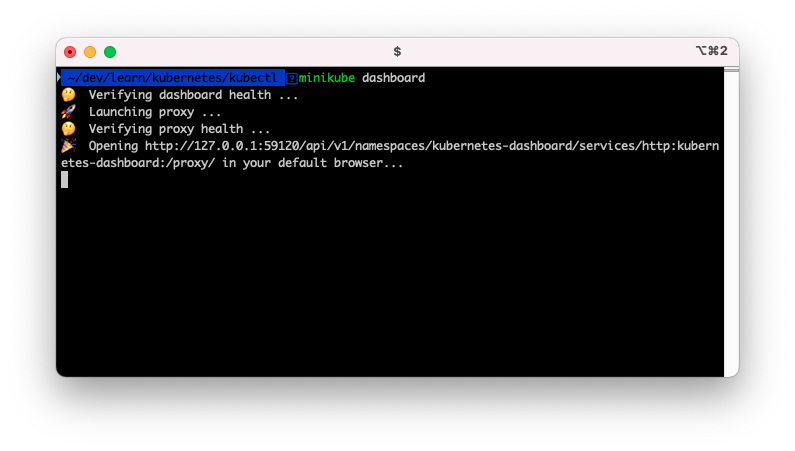
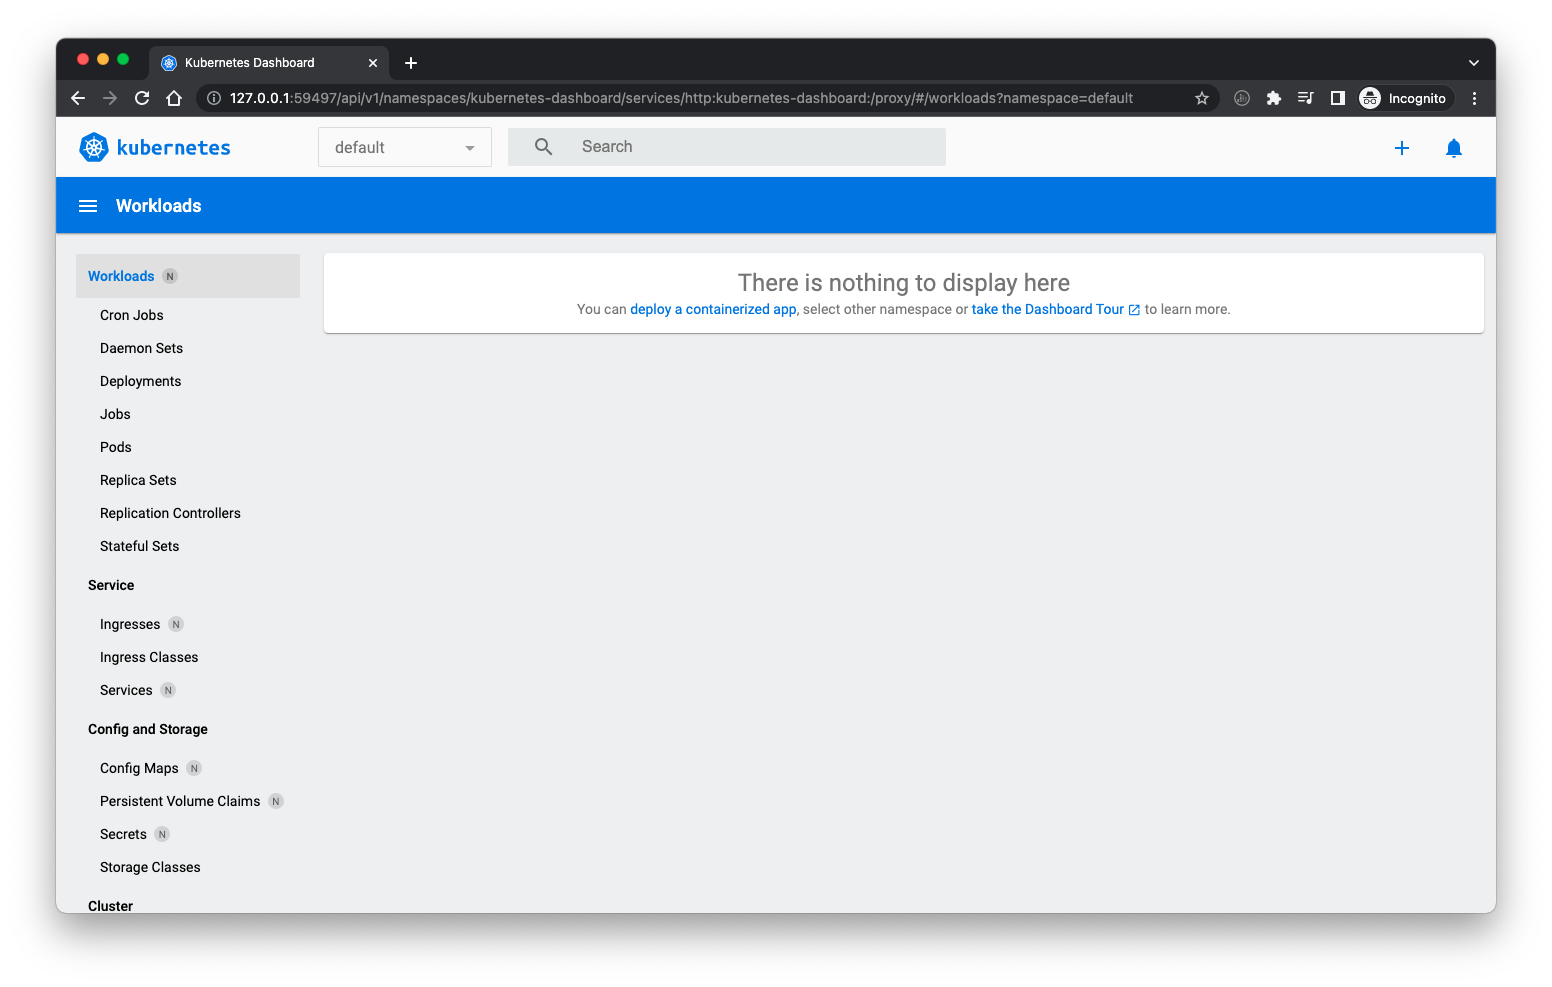
It should open a dashboard UI in browser like follow:
-
Install helm
brew install helm -
Install Argo CD CLI
brew install argocd
kubectl
Get ready
-
start minikube
minikube start --driver=hyperkit --container-runtime=docker -
point terminal’s Docker CLI to the Docker instance inside minikube
eval $(minikube docker-env) -
build demo app image
 cd apps/demo-api
 docker build -t demo-api .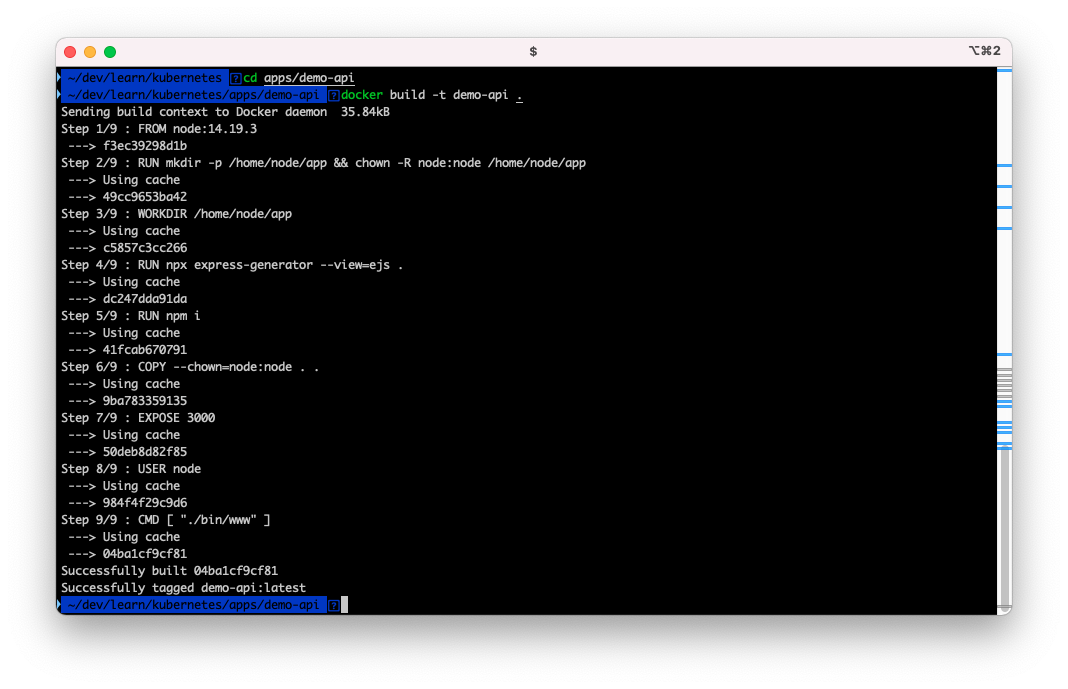
Create a Deployment
-
Create demo app Deployment
Create a Deployment that manages a Pod. The Pod runs a Container based on the provided Docker image. We can not set image pull policy on CLI and we want to use the local image, so we will create a simple config file to from CLI itself and add the parameter for image pull policy to “Never”.
Create a deployment file.
 cd ../ # if not on the root path
 cd kubectl
kubectl create deployment demo-api --image=demo-api:latest --dry-run=client -o yaml > deployment.yamlNow Modify
spec.template.spec.containersin deployment.yaml created.spec: containers: - image: demo-api:latest name: demo-api resources: {}and add
imagePullPolicy: Neverso that it looks like:spec: containers: - image: demo-api:latest name: demo-api resources: {} imagePullPolicy: NeverApply the config file with kubectl
kubectl apply -f deployment.yamlOutput is similar to:
kubectl apply -f deployment.yaml deployment.apps/demo-api created -
View the Deployment:
kubectl get deploymentsThe output is similar to:
NAME READY UP-TO-DATE AVAILABLE AGE demo-api 1/1 1 1 28s -
View the Pod:
kubectl get podsThe output is similar to:
NAME READY STATUS RESTARTS AGE demo-api-7c7d9f4689-sbkns 1/1 Running 0 100s -
View cluster events:
kubectl get events -
View the
kubectlconfiguration:kubectl config view
Create a Service
By default, the Pod is only accessible by its internal IP address within the
Kubernetes cluster. To make the demo-api Container accessible from outside.
-
Expose the Pod to the public internet using the
kubectl exposecommand:kubectl expose deployment demo-api --type=LoadBalancer --port=3000 -
View the Service you created:
kubectl get servicesThe output is similar to:
NAME TYPE CLUSTER-IP EXTERNAL-IP PORT(S) AGE demo-api LoadBalancer 10.101.236.39 <pending> 3000:30490/TCP 13s kubernetes ClusterIP 10.96.0.1 <none> 443/TCP 21s -
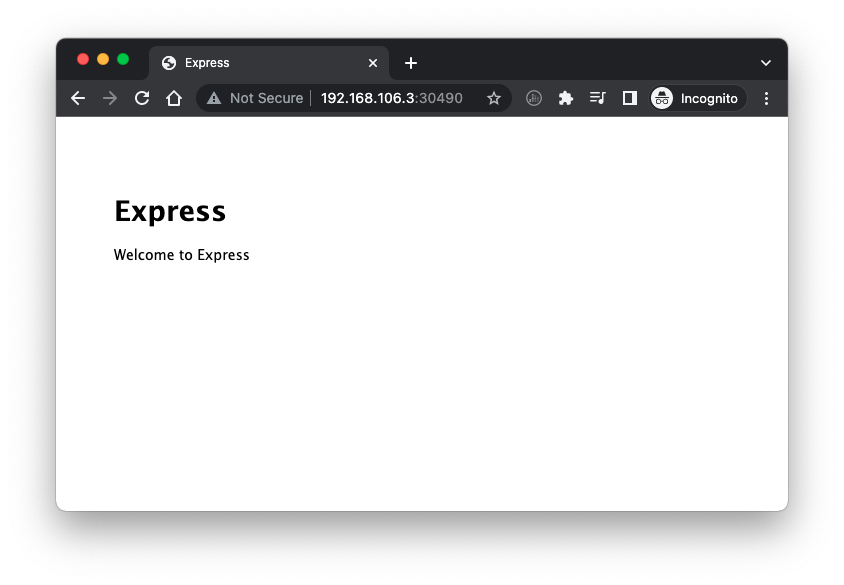
Run the following command to open the app:
minikube service demo-apiThe output is similar to:
 |-----------|----------|-------------|----------------------------|
 | NAMESPACE |   NAME   | TARGET PORT |            URL             |
 |-----------|----------|-------------|----------------------------|
 | default   | demo-api |        3000 | http://192.168.106.3:30490 |
 |-----------|----------|-------------|----------------------------|
 🎉  Opening service default/demo-api in default browser...
It should open the following page in the browser:
Clean up
-
Now you can clean up the resources you created in your cluster:
kubectl delete service demo-api kubectl delete deployment demo-api -
Optionally, stop the Minikube virtual machine (VM):
minikube stop -
Optionally, delete the Minikube VM:
minikube delete
kustomize
In this we will deploy multiple services. To do so we will be using multiple config files for kubernetes and will manage the config with help of kustomize. This will deploy a proper backend, frontend and db instance to power up a full application stack and use it as we do in production. This example will use the realworld blog app API and UI example apps.
We will deploy following services:
- blog-api: expressjs backend REST API server.
- blog-ui: react UI app being served by a nginx server.
- postgres: db for blog-api backend service.
Get ready
-
start minikube
minikube start --driver=hyperkit --container-runtime=docker -
point terminal’s Docker CLI to the Docker instance inside minikube
eval $(minikube docker-env) -
build blog-api app image
 cd apps/realblog/blog-api
 docker build -t blog-api .
Output will be similar to:
~/dev/learn/kubernetes cd apps/realblog/blog-api docker build -t blog-api . Sending build context to Docker daemon 2.048kB Step 1/10 : FROM node:16.15.0 ---> 9d200cd667d5 Step 2/10 : RUN mkdir -p /home/node/app && chown -R node:node /home/node/app ---> Using cache ---> 48145b89be5e Step 3/10 : WORKDIR /home/node ---> Using cache ---> 280c540f8d5c Step 4/10 : RUN git clone --depth 1 https://github.com/tanem/express-bookshelf-realworld-example-app.git app ---> Using cache ---> 34dd1b5c6ded Step 5/10 : RUN chown -R node:node /home/node/app ---> Using cache ---> d95cb606a0de Step 6/10 : WORKDIR /home/node/app ---> Using cache ---> 740cacc09bdd Step 7/10 : RUN npm i ---> Using cache ---> 7b86ce450a87 Step 8/10 : EXPOSE 3000 ---> Using cache ---> 1b4d3ba26c7b Step 9/10 : USER node ---> Using cache ---> 06c0b457b04a Step 10/10 : CMD [ "./bin/start.sh" ] ---> Using cache ---> 487c135295f6 Successfully built 487c135295f6 Successfully tagged blog-api:latest `` -
build blog-ui app image
 cd apps/realblog/blog-ui
 docker build -t blog-ui .
Output will be similar to:
~ cd apps/realblog/blog-ui ~ docker build -t blog-ui . Sending build context to Docker daemon 2.56kB Step 1/11 : FROM node:14.19.3 as base ---> f3ec39298d1b Step 2/11 : RUN mkdir -p /home/node/app && chown -R node:node /home/node/app ---> Using cache ---> 49cc9653ba42 Step 3/11 : WORKDIR /home/node ---> Using cache ---> 8668cbb0d4c8 Step 4/11 : RUN git clone --depth 1 https://github.com/angelguzmaning/ts-redux-react-realworld-example-app.git app ---> Using cache ---> 24326deaa442 Step 5/11 : RUN chown -R node:node /home/node/app ---> Using cache ---> f0a11bcbee98 Step 6/11 : WORKDIR /home/node/app ---> Using cache ---> 7b2bb3a27151 Step 7/11 : RUN npm i ---> Using cache ---> bd859e464065 Step 8/11 : RUN npm run build ---> Using cache ---> f2249c73479a Step 9/11 : USER node ---> Using cache ---> 9a1326890a11 Step 10/11 : FROM nginx ---> 1403e55ab369 Step 11/11 : COPY --from=base /home/node/app/build /usr/share/nginx/html ---> Using cache ---> 29b831cc3064 Successfully built 29b831cc3064 Successfully tagged blog-ui:latest -
enable ingress plugin
Ref: https://kubernetes.io/docs/concepts/services-networking/ingress/
minikube addons enable ingress -
add domain to hosts
Get minikube IP
minikube ipupdate your machine’s hosts file
sudo vi /etc/hostsAdd the host
realblog.localto the file and point it to minikube IP.Hosts should look like:
 127.0.0.1	localhost
 255.255.255.255	broadcasthost
 ::1             localhost

 192.168.106.3 realblog.local
Deploy apps
-
apply config with kustomize to kubectl
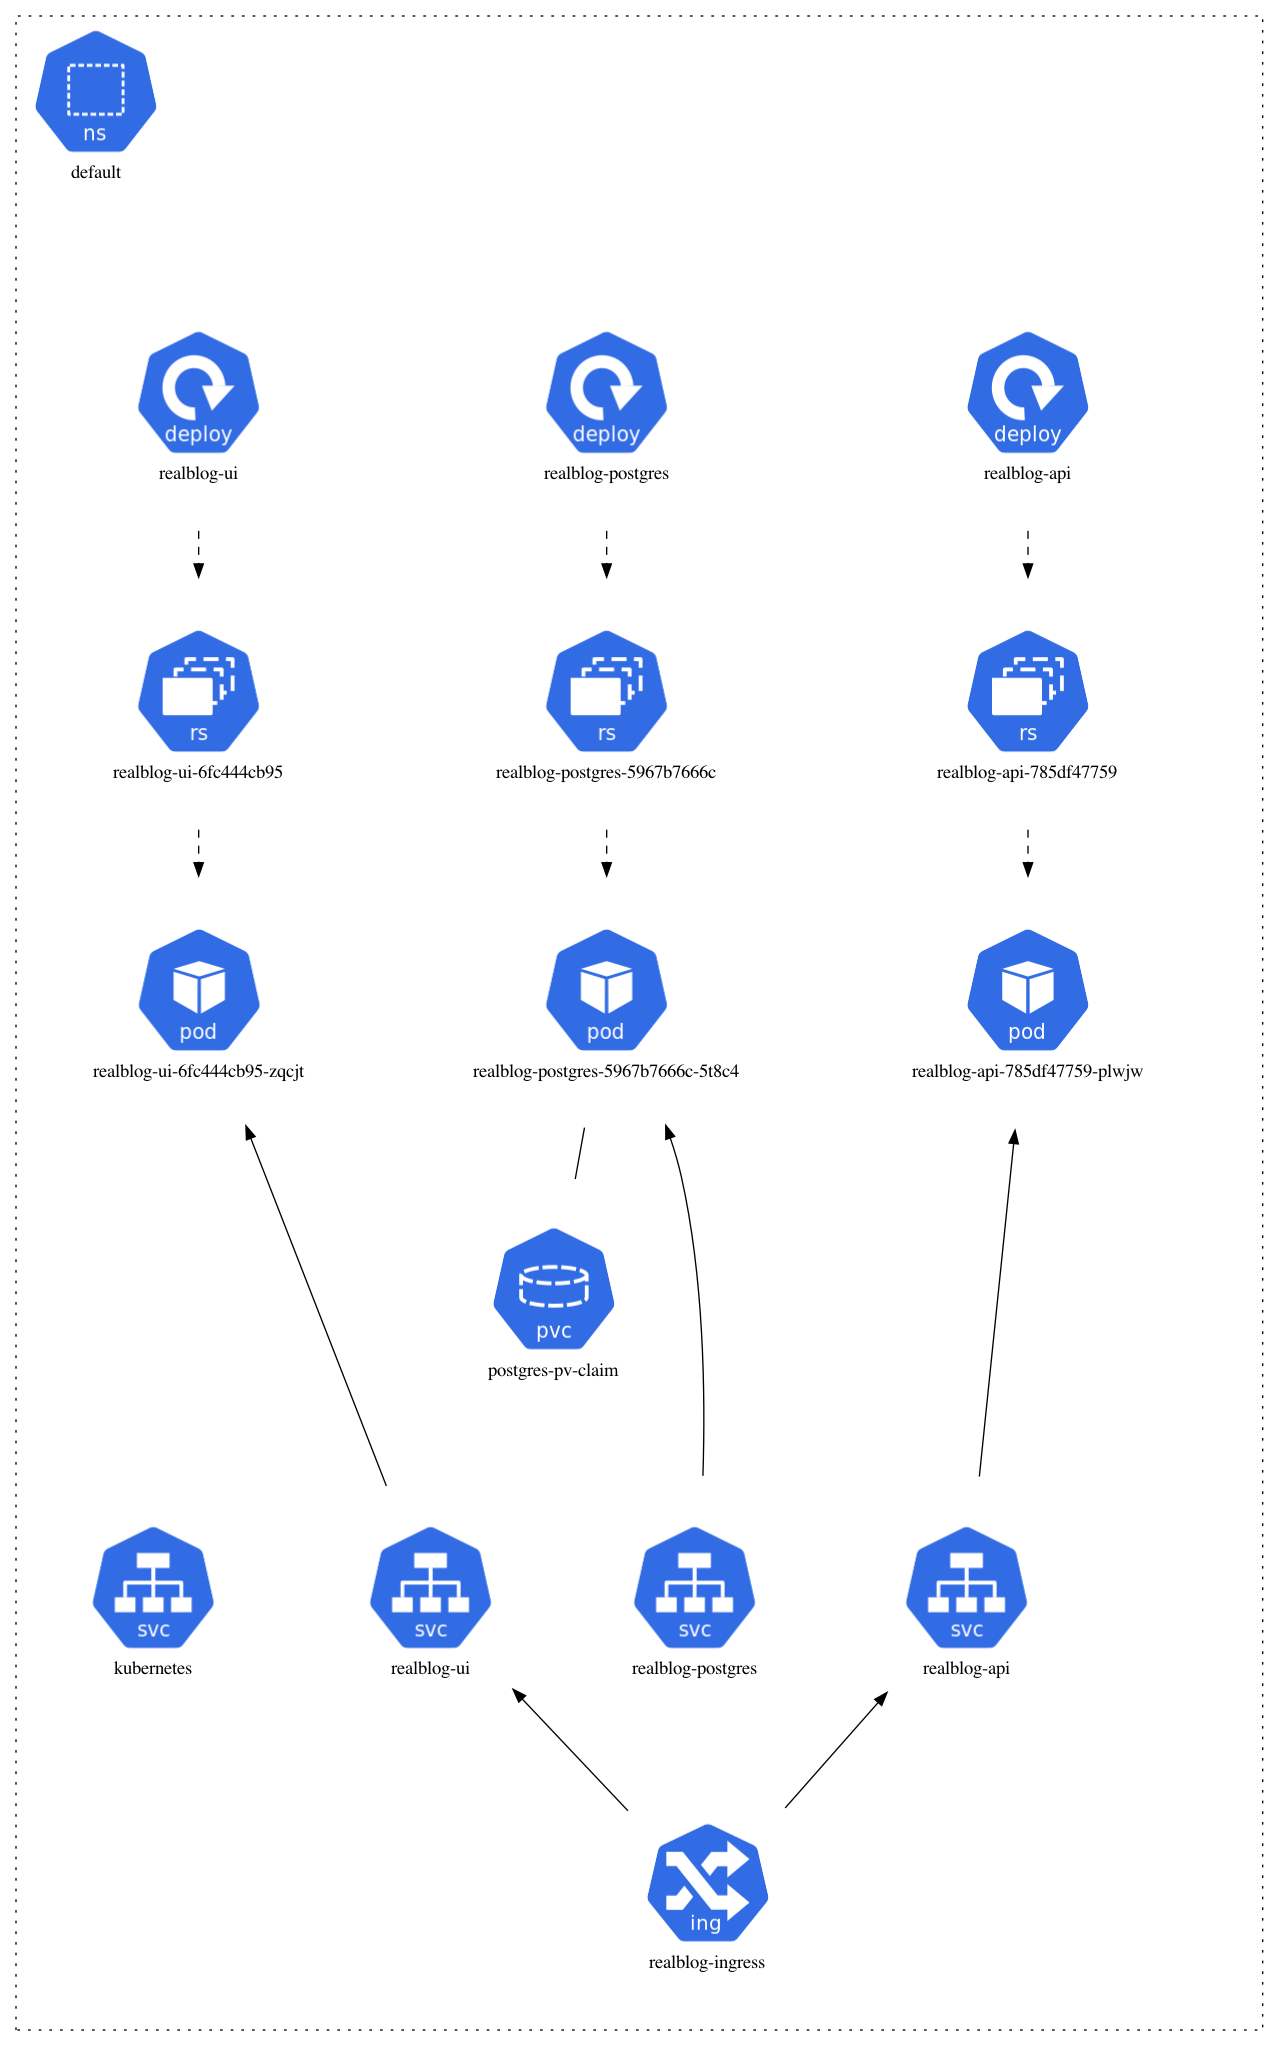
 cd kustomize/realblog
 kubectl apply -k ./
Output will be similar to:
service/realblog-api created service/realblog-postgres created service/realblog-ui created persistentvolumeclaim/postgres-pv-claim created deployment.apps/realblog-api created deployment.apps/realblog-postgres created deployment.apps/realblog-ui created ingress.networking.k8s.io/realblog-ingress created -
verify deployment and services
list deployments
kubectl get deploymentsOutput will be similar to:
 kubectl get deployments
 NAME                READY   UP-TO-DATE   AVAILABLE   AGE
 realblog-api        1/1     1            1           2m44s
 realblog-postgres   1/1     1            1           2m44s
 realblog-ui         1/1     1            1           2m44s
list pods
kubectl get podsOutput will be similar to:
 NAME                                 READY   STATUS    RESTARTS   AGE
 realblog-api-785df47759-plwjw        1/1     Running   0          4m15s
 realblog-postgres-5967b7666c-5t8c4   1/1     Running   0          4m15s
 realblog-ui-6fc444cb95-zqcjt         1/1     Running   0          4m15s	```

 list services
 ```shell
 kubectl get services
Output will be similar to:
 NAME                TYPE           CLUSTER-IP     EXTERNAL-IP   PORT(S)          AGE
 kubernetes          ClusterIP      10.96.0.1      <none>        443/TCP          12h
 realblog-api        LoadBalancer   10.99.28.2     <pending>     3000:30148/TCP   5m23s
 realblog-postgres   ClusterIP      None           <none>        5432/TCP         5m23s
 realblog-ui         LoadBalancer   10.99.96.128   <pending>     80:32187/TCP     5m23s
list ingress
kubectl get ingressOutput will be similar to:
NAME CLASS HOSTS ADDRESS PORTS AGE realblog-ingress nginx realblog.local 192.168.106.3 80 6m21s -
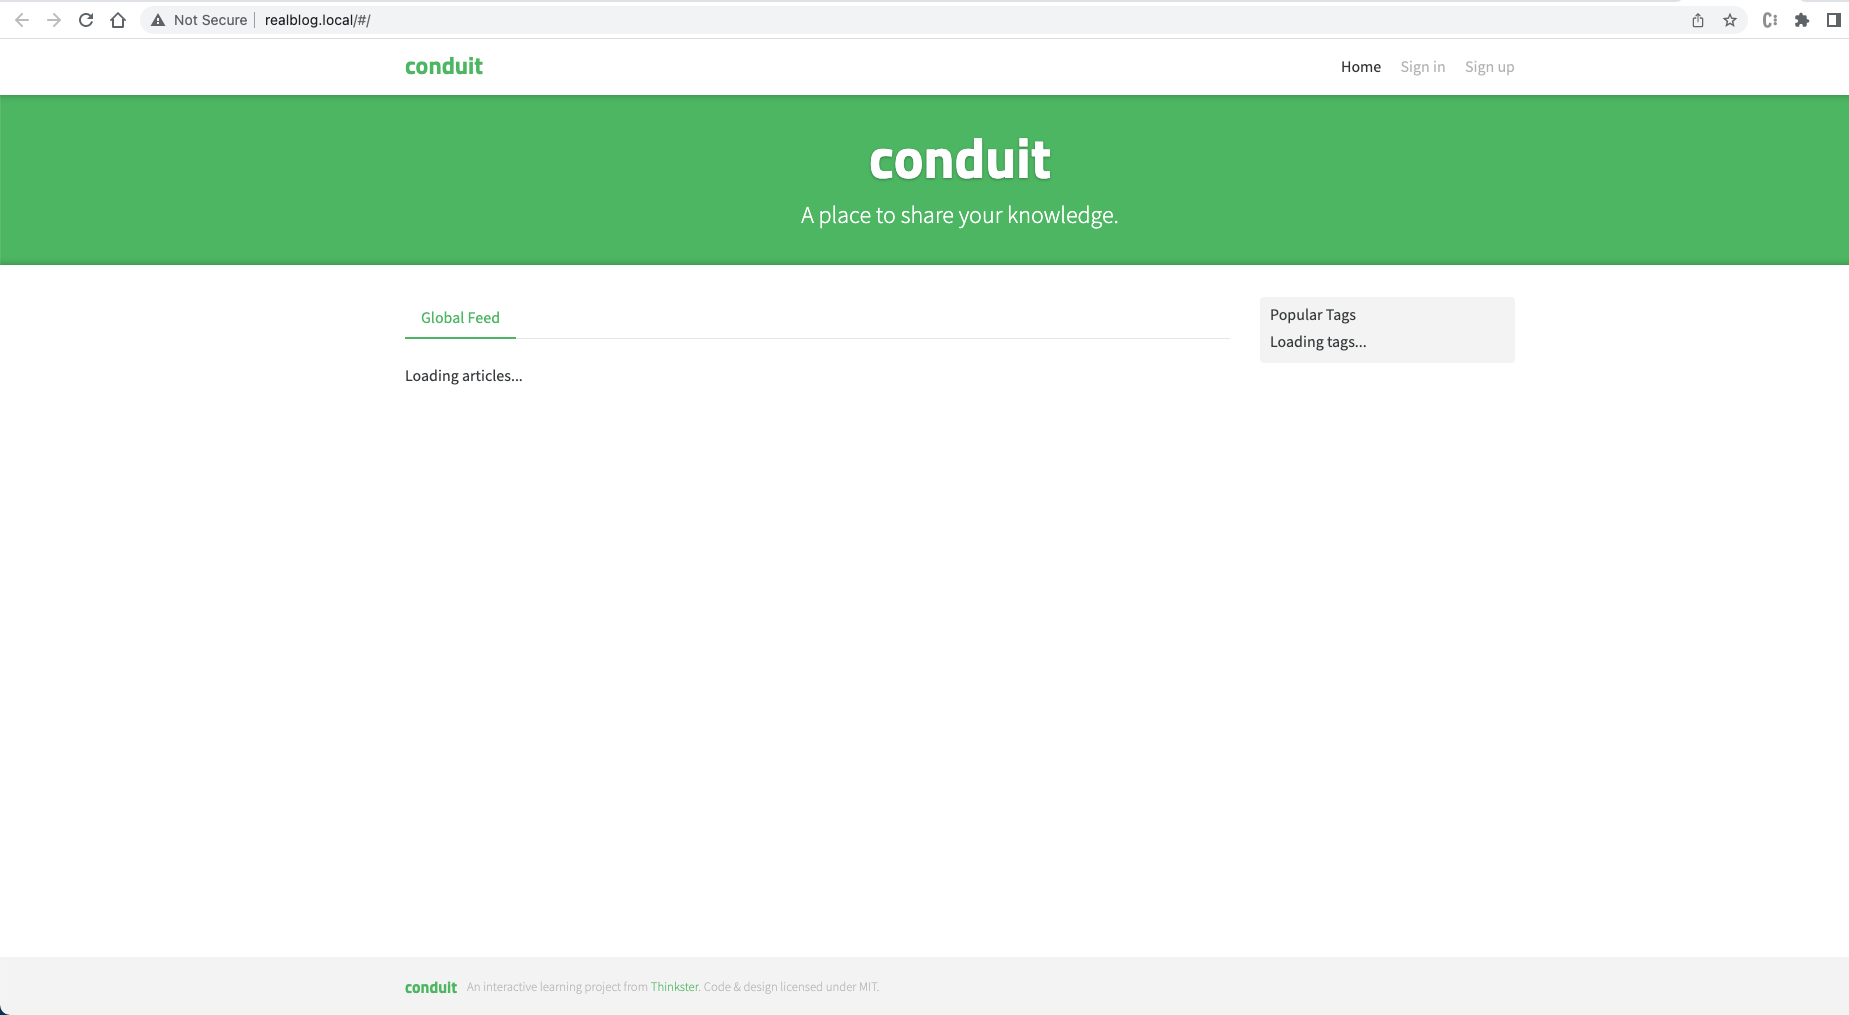
Use blog app
open “http://realblog.local” in browser. A blogger site should open. Create a user and add some articles to test the app follow.
Clean up
-
Now you can clean up the resources you created in your cluster:
Run the following command from
kustomize/realblog:kubectl delete -k ./ -
Optionally, stop the Minikube virtual machine (VM):
minikube stop -
Optionally, delete the Minikube VM:
minikube delete
HELM
We will learn this in two phases, first we will deploy the default nginx app and then our demo-api app, second we will deploy the complete realblog project with db, API and UI services and expose it with the ingress.
Get ready
-
start minikube
minikube start --driver=hyperkit --container-runtime=docker -
point terminal’s Docker CLI to the Docker instance inside minikube
eval $(minikube docker-env) -
build demo-api app image
 cd apps/demo-api
 docker build -t demo-api .
 cd ../../
Create a chart with helm CLI
-
switch to helm dir
cd helm -
create helm chart with helm CLI (default template)
This command creates a directory “realblog” inside which it pusts charts for a service.
helm create demo -
explore helm chart created
 cd demo
 ls
Result should be similar to:
Chart.yaml charts templates values.yaml -
install the chart
helm install demo .Results should be similar to:
NAME: demo LAST DEPLOYED: Tue Jan 3 19:46:54 2023 NAMESPACE: default STATUS: deployed REVISION: 1 NOTES: 1. Get the application URL by running these commands: export POD_NAME=$(kubectl get pods --namespace default -l "app.kubernetes.io/name=demo,app.kubernetes.io/instance=demo" -o jsonpath="{.items[0].metadata.name}") export CONTAINER_PORT=$(kubectl get pod --namespace default $POD_NAME -o jsonpath="{.spec.containers[0].ports[0].containerPort}") echo "Visit http://127.0.0.1:8080 to use your application" kubectl --namespace default port-forward $POD_NAME 8080:$CONTAINER_PORT -
expose the service to access from machine To access the app on http follow on screen instructions or run
kubectl --namespace default port-forward deployment/demo 8080:80Result should be similar to:
Forwarding from 127.0.0.1:8080 -> 80 Forwarding from [::1]:8080 -> 80 Handling connection for 8080 Handling connection for 8080 -
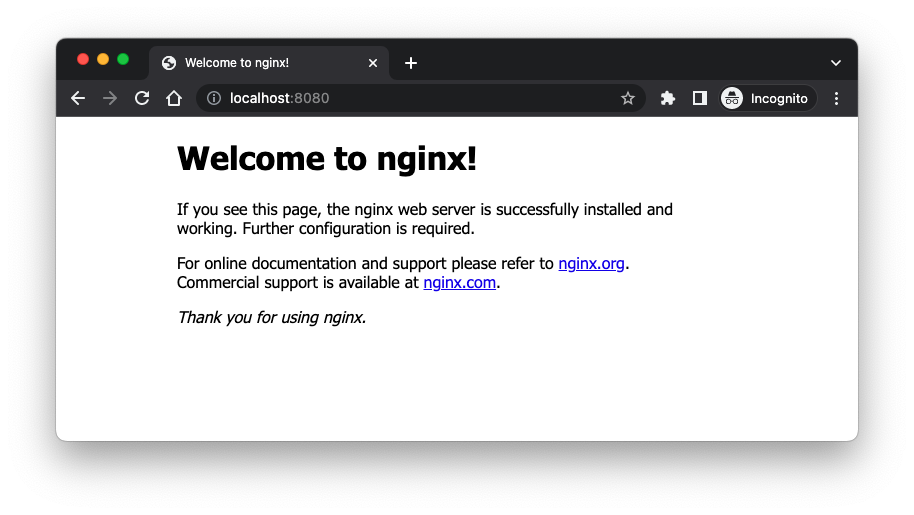
verify on browser
Open http://localhost:8080 in browser and you should be able to see a nginx welcome screen.
Deploy demo-api app with helm
-
switch to demo chart created in previous stage
cd helm/demo -
update chart
Update the image repository and tag to use demo-api image and latest tag in values.yaml file, to do so in the file
helm/demo/values.yamlupdate following:image.repository : demo-apiimage.tag : latestservice.port : 3000 -
upgrade the deployment
helm upgrade demo .Result should be similar to:
Release "demo" has been upgraded. Happy Helming! NAME: demo LAST DEPLOYED: Wed Jan 4 12:33:24 2023 NAMESPACE: default STATUS: deployed REVISION: 3 NOTES: 1. Get the application URL by running these commands: export POD_NAME=$(kubectl get pods --namespace default -l "app.kubernetes.io/name=demo,app.kubernetes.io/instance=demo" -o jsonpath="{.items[0].metadata.name}") export CONTAINER_PORT=$(kubectl get pod --namespace default $POD_NAME -o jsonpath="{.spec.containers[0].ports[0].containerPort}") echo "Visit http://127.0.0.1:8080 to use your application" kubectl --namespace default port-forward $POD_NAME 8080:$CONTAINER_PORT -
expose the service to access from machine To access the app on http follow on screen instructions or run
kubectl --namespace default port-forward deployment/demo 8080:3000Result should be similar to:
Forwarding from 127.0.0.1:8080 -> 3000 Forwarding from [::1]:8080 -> 3000 Handling connection for 8080 Handling connection for 8080 -
verify on browser
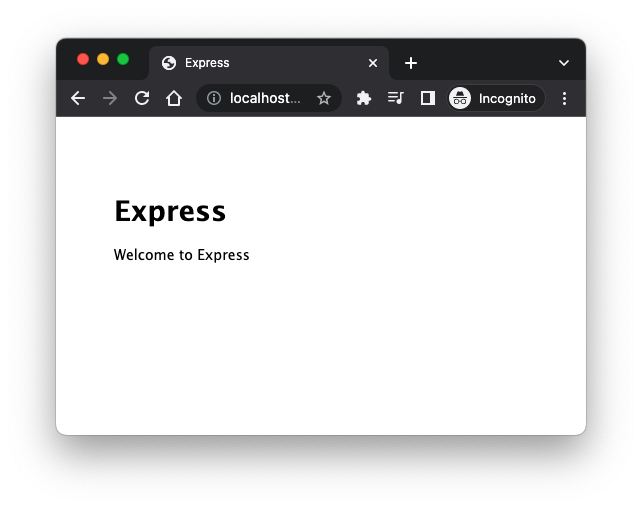
Open http://localhost:8080 in browser and you should be able to see express app.
-
delete deployments
Delete the deployent to avoid confusion while trying next/other stages.
helm uninstall demo --waitIt should return :
release "demo" uninstalled
Deploy realblog stack
-
start minikube
minikube start --driver=hyperkit --container-runtime=docker -
point terminal’s Docker CLI to the Docker instance inside minikube
eval $(minikube docker-env) -
build blog-api app image
cd apps/realblog/blog-api docker build -t blog-api . -
build blog-ui app image
cd apps/realblog/blog-ui docker build -t blog-ui . -
switch to helm charts directory for realblog
cd helm/realblog -
install charts
helm install realblog .Result should be similar to:
NAME: realblog LAST DEPLOYED: Wed Jan 4 12:47:08 2023 NAMESPACE: default STATUS: deployed REVISION: 1 NOTES: 1. Get the application URL by running these commands: http://realblog.local/ http://realblog.local/api -
Add cluster IP to local hosts entry for dns resolution
Get minikube IP
minikube ipupdate your machine’s hosts file
sudo vi /etc/hostsAdd the host
realblog.localto the file and point it to minikube IP.Hosts should look like:
 127.0.0.1	localhost
 255.255.255.255	broadcasthost
 ::1             localhost

 192.168.106.3 realblog.local
In this the IP
192.168.106.3is the IP of cluster node returned by commandminikube ip -
verify on browser
Open http://realblog.local/ in browser and you should be able to see blog app UI.
Clean up
-
Now you can clean up the resources you created in your cluster:
helm uninstall realblog --wait -
Optionally, stop the Minikube virtual machine (VM):
minikube stop -
Optionally, delete the Minikube VM:
minikube delete
Argo CD
Get ready
-
start minikube
minikube start --driver=hyperkit --container-runtime=docker -
point terminal’s Docker CLI to the Docker instance inside minikube
eval $(minikube docker-env) -
build blog-api app image
cd apps/realblog/blog-api docker build -t blog-api . -
build blog-ui app image
cd apps/realblog/blog-ui docker build -t blog-ui . -
add domain to hosts
Get minikube IP
minikube ipupdate your machine’s hosts file
sudo vi /etc/hostsAdd the host
realblog.localto the file and point it to minikube IP.Hosts should look like:
 127.0.0.1	localhost
 255.255.255.255	broadcasthost
 ::1             localhost

 192.168.106.3 realblog.local
In this the IP
192.168.106.3is the IP of cluster node returned by commandminikube ip -
Run argo CD
 kubectl create namespace argocd
 kubectl apply -n argocd -f https://raw.githubusercontent.com/argoproj/argo-cd/stable/manifests/install.yaml
 kubectl port-forward svc/argocd-server -n argocd 8080:443
Results should be similar to:
namespace/argocd createdcustomresourcedefinition.apiextensions.k8s.io/applications.argoproj.io created customresourcedefinition.apiextensions.k8s.io/applicationsets.argoproj.io created customresourcedefinition.apiextensions.k8s.io/appprojects.argoproj.io created serviceaccount/argocd-application-controller created serviceaccount/argocd-applicationset-controller created serviceaccount/argocd-dex-server created serviceaccount/argocd-notifications-controller created serviceaccount/argocd-redis created serviceaccount/argocd-repo-server created serviceaccount/argocd-server created role.rbac.authorization.k8s.io/argocd-application-controller created role.rbac.authorization.k8s.io/argocd-applicationset-controller created role.rbac.authorization.k8s.io/argocd-dex-server created role.rbac.authorization.k8s.io/argocd-notifications-controller created role.rbac.authorization.k8s.io/argocd-server created clusterrole.rbac.authorization.k8s.io/argocd-application-controller created clusterrole.rbac.authorization.k8s.io/argocd-server created rolebinding.rbac.authorization.k8s.io/argocd-application-controller created rolebinding.rbac.authorization.k8s.io/argocd-applicationset-controller created rolebinding.rbac.authorization.k8s.io/argocd-dex-server created rolebinding.rbac.authorization.k8s.io/argocd-notifications-controller created rolebinding.rbac.authorization.k8s.io/argocd-redis created rolebinding.rbac.authorization.k8s.io/argocd-server created clusterrolebinding.rbac.authorization.k8s.io/argocd-application-controller created clusterrolebinding.rbac.authorization.k8s.io/argocd-server created configmap/argocd-cm created configmap/argocd-cmd-params-cm created configmap/argocd-gpg-keys-cm created configmap/argocd-notifications-cm created configmap/argocd-rbac-cm created configmap/argocd-ssh-known-hosts-cm created configmap/argocd-tls-certs-cm created secret/argocd-notifications-secret created secret/argocd-secret created service/argocd-applicationset-controller created service/argocd-dex-server created service/argocd-metrics created service/argocd-notifications-controller-metrics created service/argocd-redis created service/argocd-repo-server created service/argocd-server created service/argocd-server-metrics created deployment.apps/argocd-applicationset-controller created deployment.apps/argocd-dex-server created deployment.apps/argocd-notifications-controller created deployment.apps/argocd-redis created deployment.apps/argocd-repo-server created deployment.apps/argocd-server created statefulset.apps/argocd-application-controller created networkpolicy.networking.k8s.io/argocd-application-controller-network-policy created networkpolicy.networking.k8s.io/argocd-applicationset-controller-network-policy created networkpolicy.networking.k8s.io/argocd-dex-server-network-policy created networkpolicy.networking.k8s.io/argocd-notifications-controller-network-policy created networkpolicy.networking.k8s.io/argocd-redis-network-policy created networkpolicy.networking.k8s.io/argocd-repo-server-network-policy created networkpolicy.networking.k8s.io/argocd-server-network-policy createdForwarding from 127.0.0.1:8080 -> 8080 Forwarding from [::1]:8080 -> 8080 Handling connection for 8080 Handling connection for 8080 -
Use Argo CD UI
Open https://localhost:8080/ in your browser and you should see login page of the argocd.
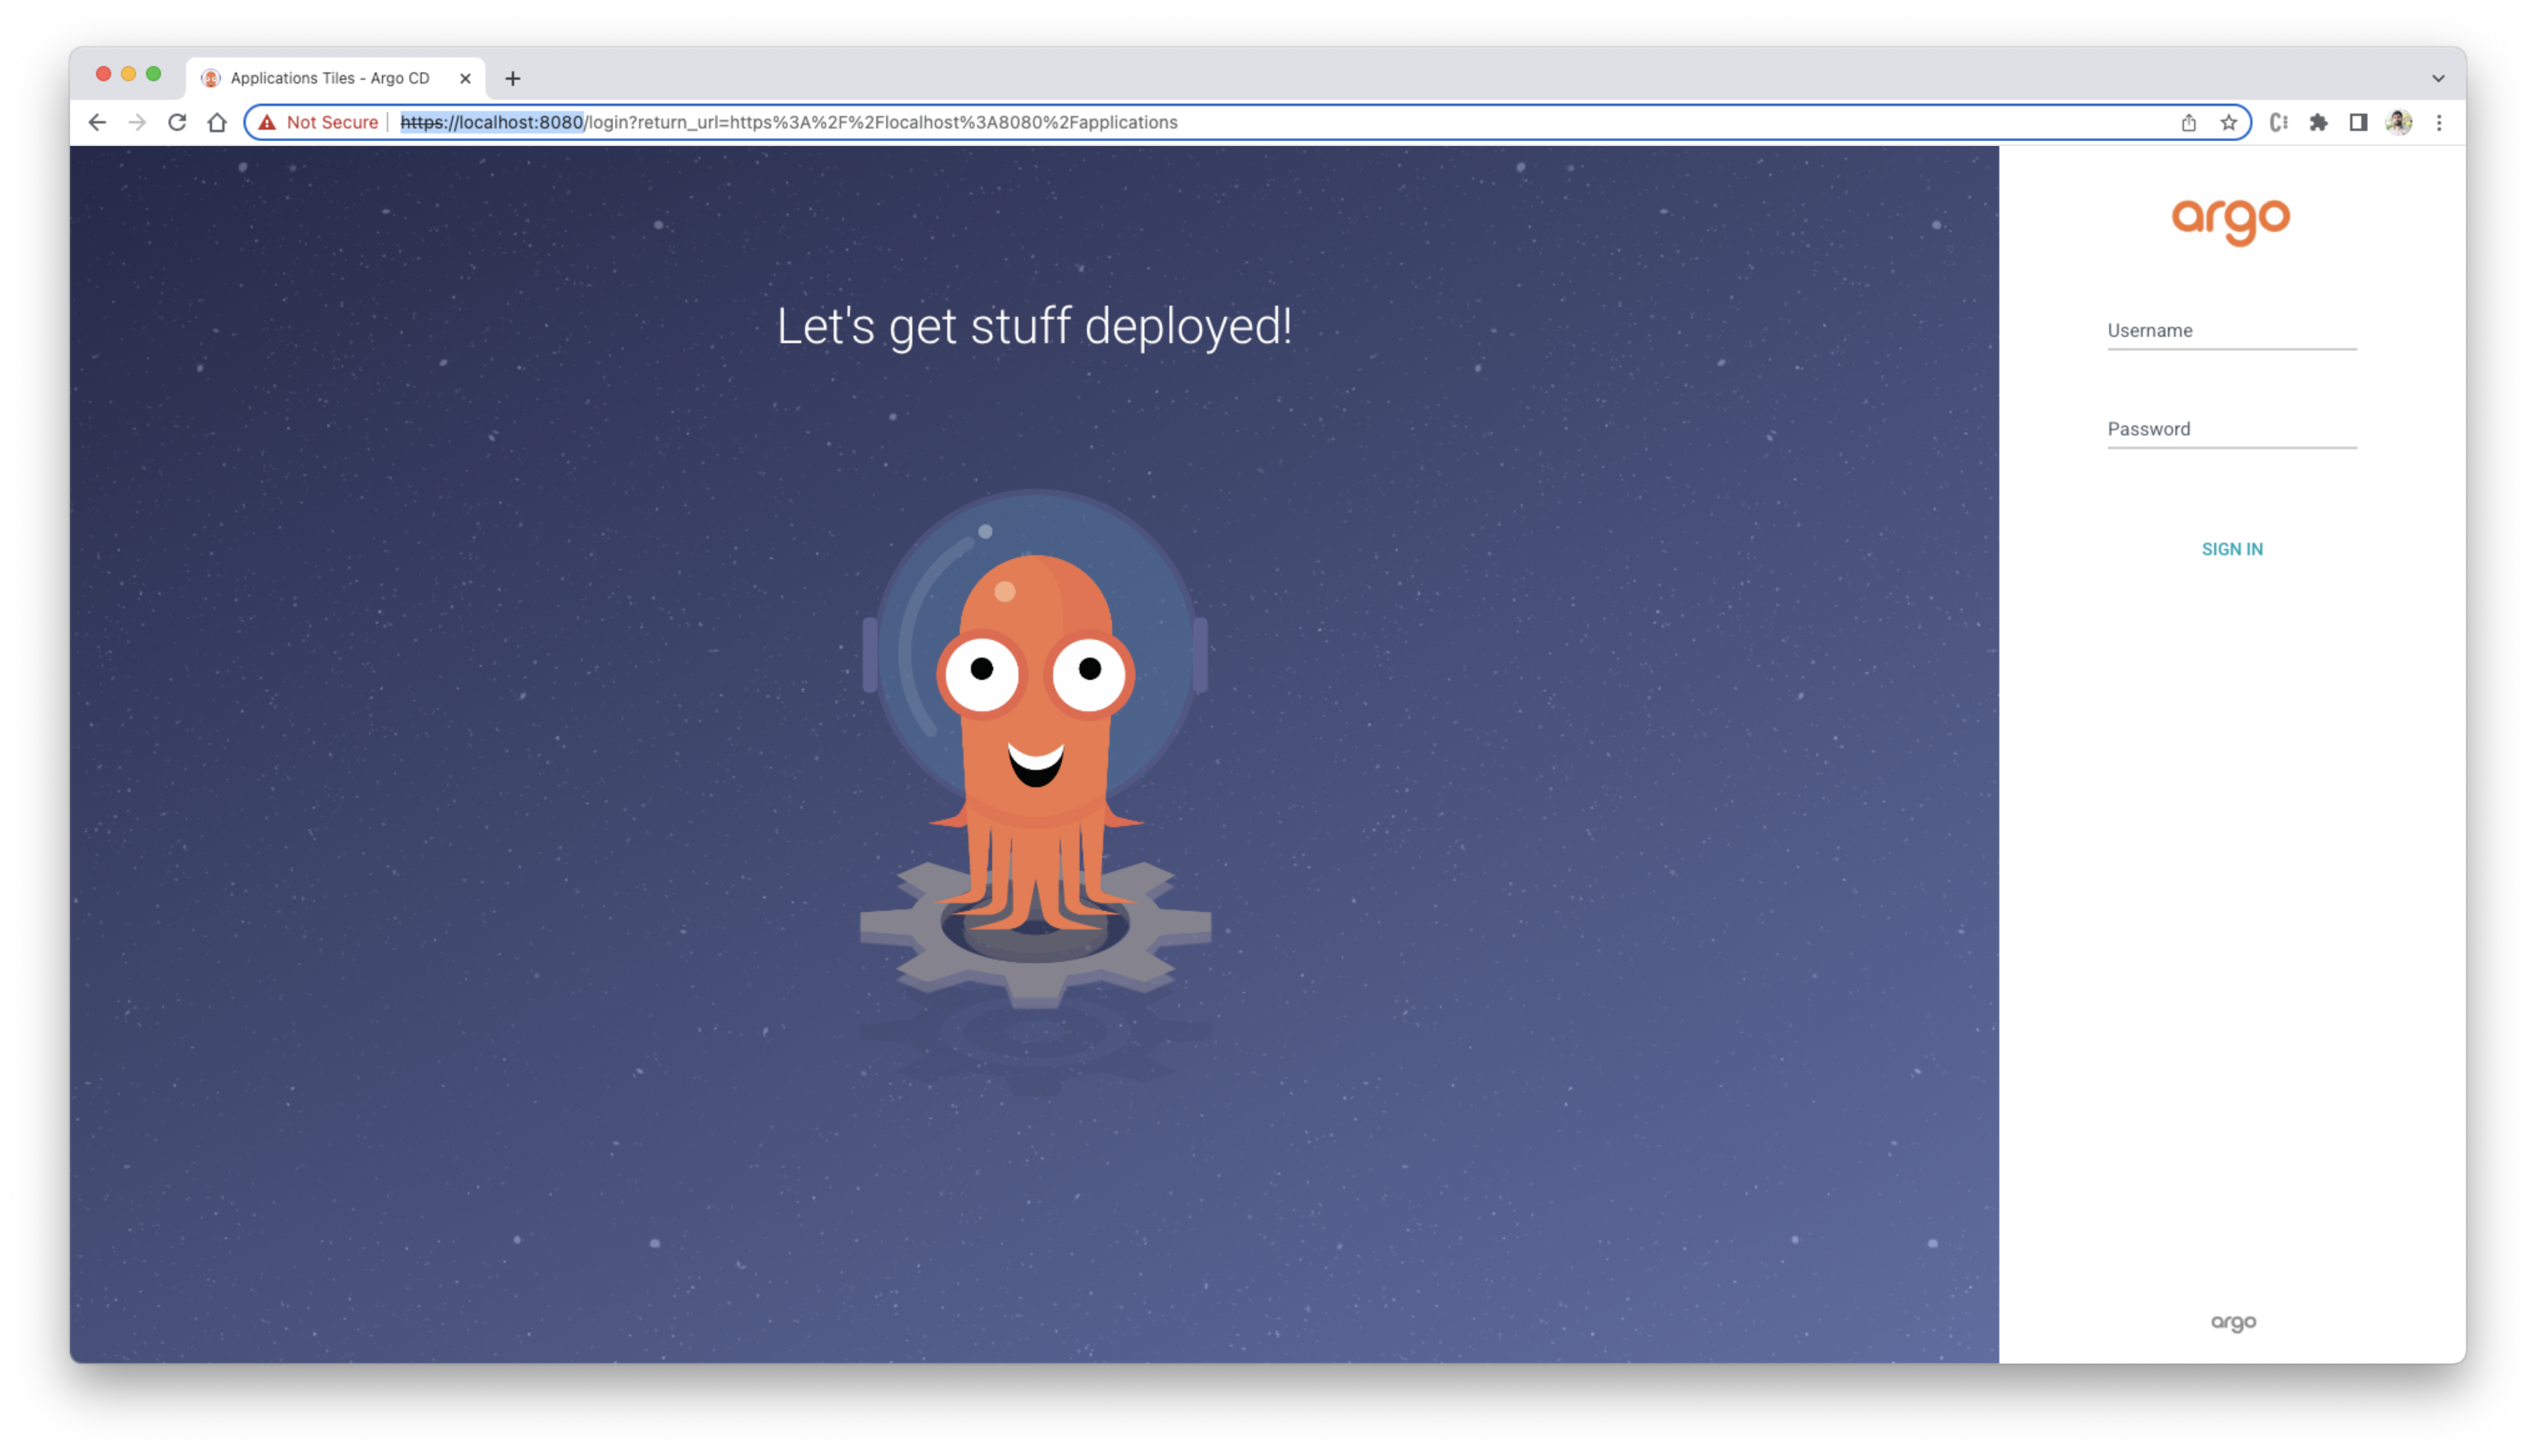
Login with username and password:
Username is
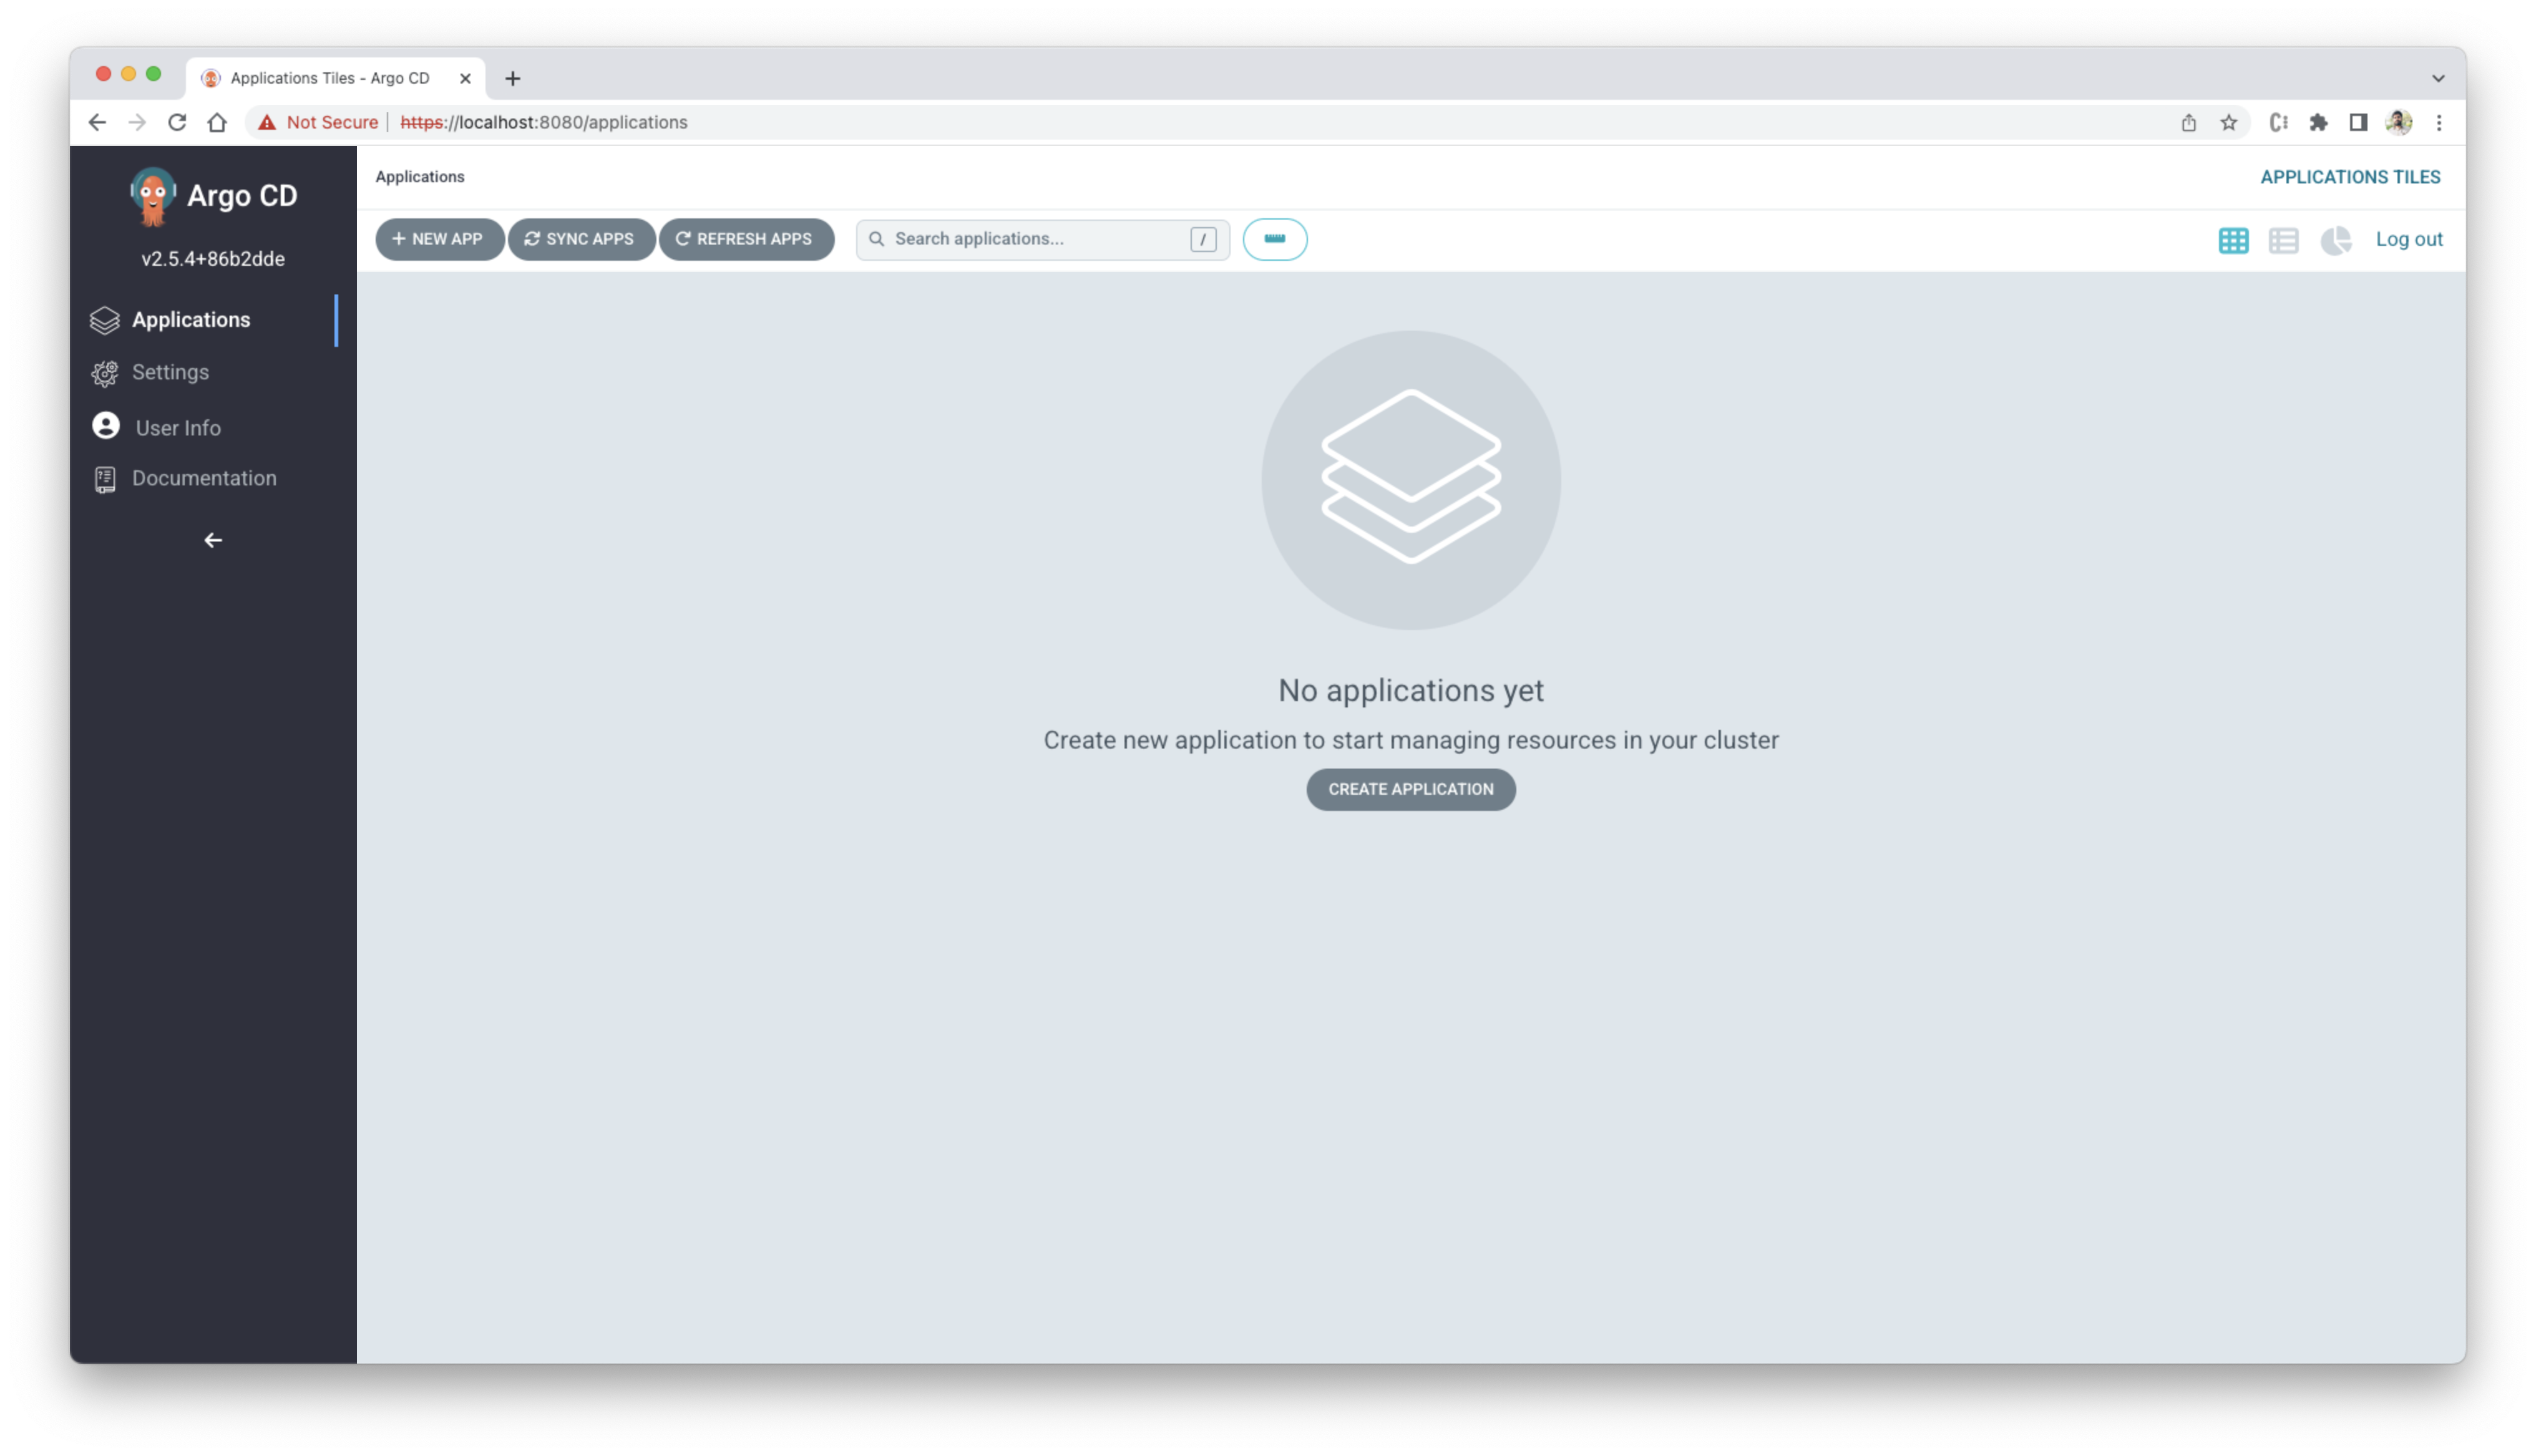
adminand password you can get from following command:kubectl -n argocd get secret argocd-initial-admin-secret -o jsonpath="{.data.password}" | base64 -d; echoAfter login you should see the app explorer page like follow:
-
get CLI ready
You can create app from UI also but this guide will use CLI to create the app.
- open a new terminal as the cuurent one is used to port farward argo.
- Login on argocd CLI
argocd login localhost:8080the result should be similar to:
 WARNING: server certificate had error: x509: “Argo CD” certificate is not trusted. Proceed insecurely (y/n)? y
 Username: admin
 Password:
 'admin:login' logged in successfully
 Context 'localhost:8080' updated
use the same username and password used to login on UI.
create argocd app
In this we will use the same helm charts used for deployment of services and images created in set up section to create deployment through argocd.
-
create app with CLI
argocd app create realblog --repo https://github.com/satyamyadav/kubernetes-101.git --path helm/realblog --dest-server https://kubernetes.default.svc --dest-namespace default -
verify on browser
open https://localhost:8080/applications/argocd/realblog?view=tree&resource=kind%3ADeployment It should show the deployments.
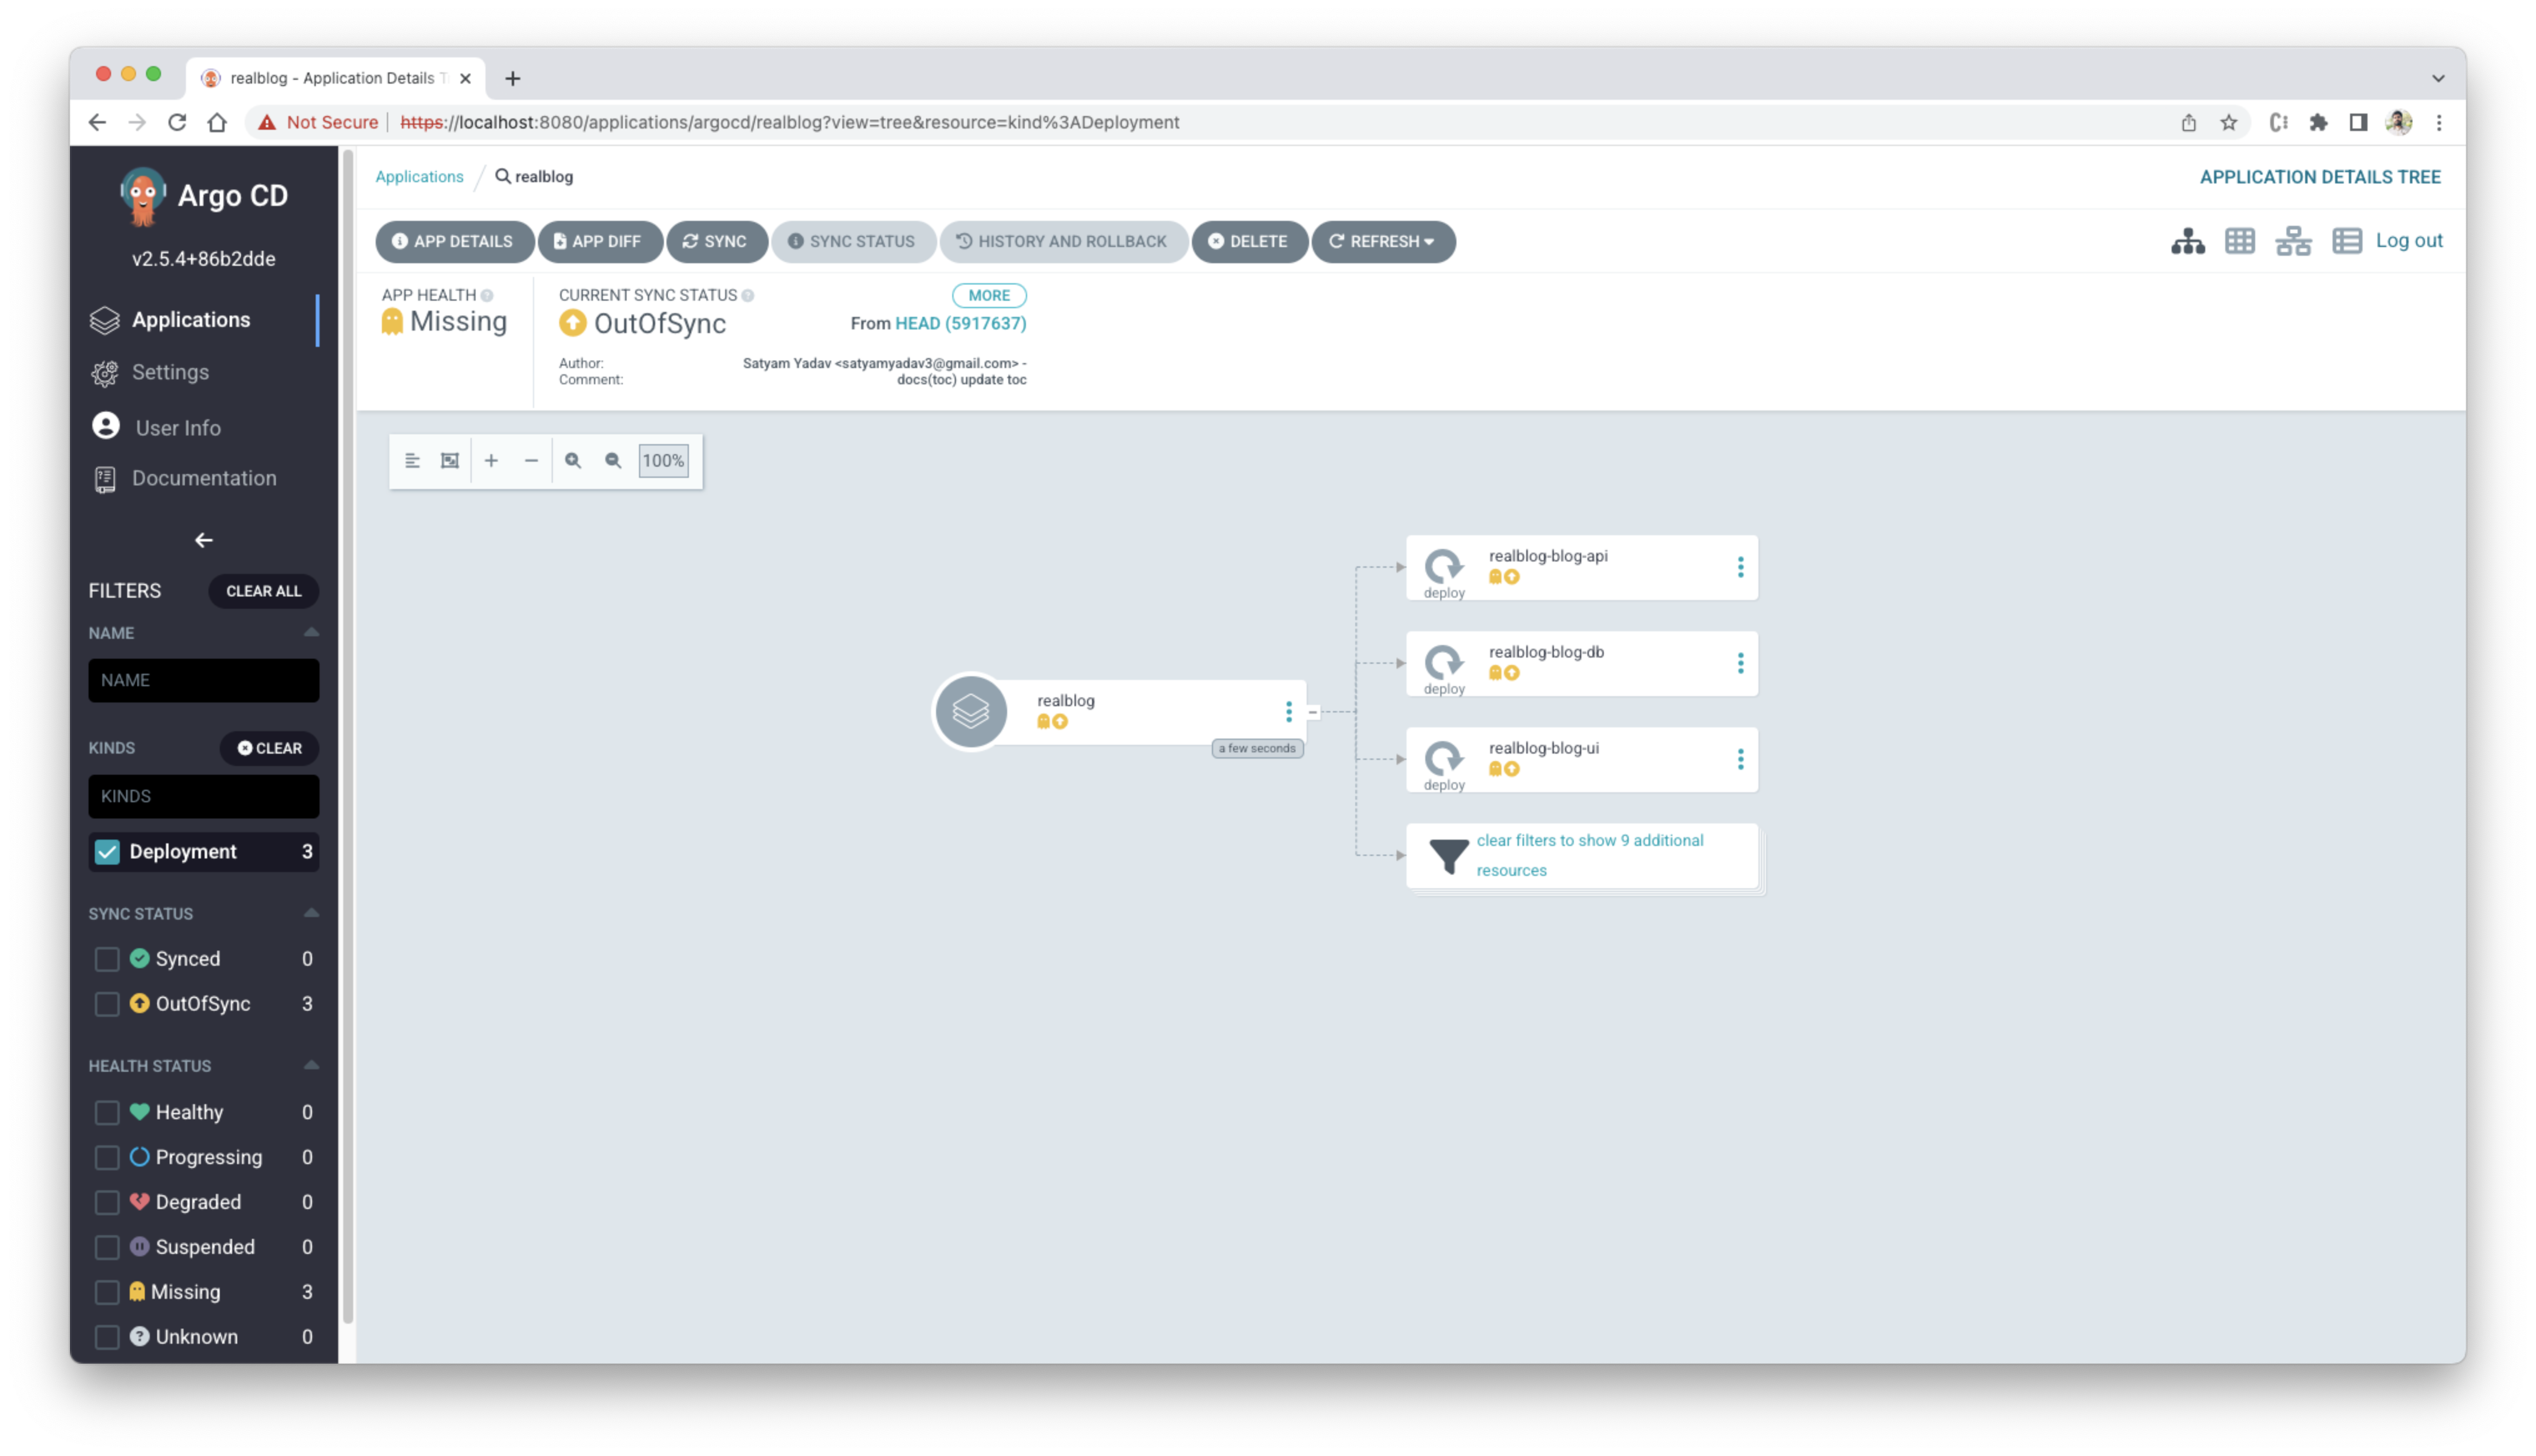
Sync the app if it is not synced.
-
verify app
open http://realblog.local you should see the blog app UI home page.
Clean up
-
Now you can clean up the resources you created in your cluster: you can delete the app from argocd UI also.
argocd app delete realblog -
Optionally, stop the Minikube virtual machine (VM):
minikube stop -
Optionally, delete the Minikube VM:
minikube delete
References
- Kubernetes: https://kubernetes.io/docs/tutorials/hello-minikube/
- Helm: https://helm.sh/
- ArgoCD: https://argo-cd.readthedocs.io/en/stable/getting_started/